22. Making a Bot Account (Discord)#
Choose Social Media Platform: Bluesky | Reddit | Discord | Mastodon | No Coding
In using this textbook, you will have opportunities to create and run social media bots. Here we will run through how to create a Discord account and set it up for running your own bots.
While we have made a fake version of Discord for you to test all the code in this book, we highly encourage you to make a Discord bot account and try it out for real!
22.1. Sign up for Discord#
We suggest making a new, separate Discord account, just for making Discord bots, since you don’t want to accidentally get your main Discord account banned or labeled as a bot. Also we suggest using a different password than you use for other accounts, since you might accidentally share it with your code.
Note: If you want to make a new account and you already have one, you may need to sign out from your current account, use a different email address, or use a different web browser (e.g., Mozilla, Google Chrome, Microsoft Edge, Safari).
22.2. Create your own Discord Server#
It is easiest to test your bot by creating your own discord server.
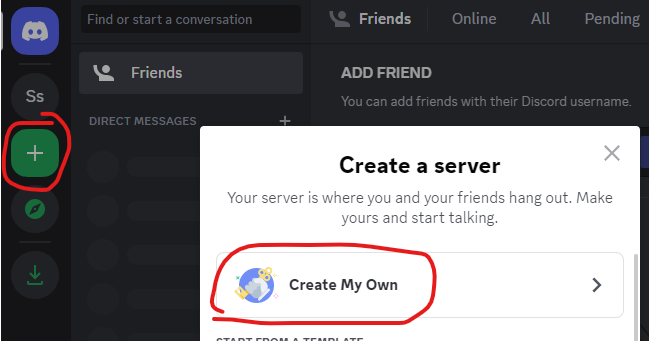
Fig. 22.1 Create a Discord server#
22.3. Create a Discord “Application”#
Note: Instructions are based on the official instructions here: https://discord.com/developers/docs/getting-started
In order for your bot to run, you must create a Discord “Application.” Go to the Discord Developer Portal and click “New Application”:
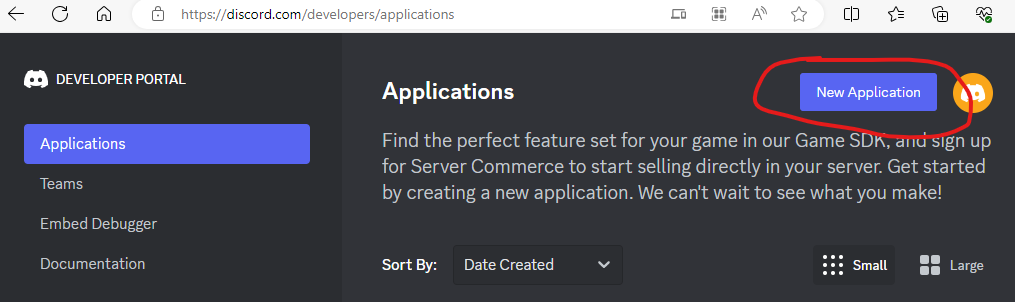
Fig. 22.2 Create a new application in the developer portal.#
Make up a name for your app and press the “Create” button:
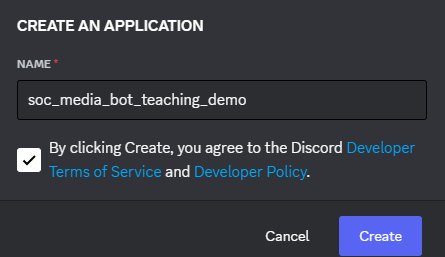
Fig. 22.3 Make up a name for your application (the name of your bot).#
22.4. Get Discord Token#
In order to make your bot work, you’ll need to create a special password for your bot to use, which is called a “token.” Reset your token and save it somewhere (e.g., email it to yourself). You’ll need it later to let your bot log in.
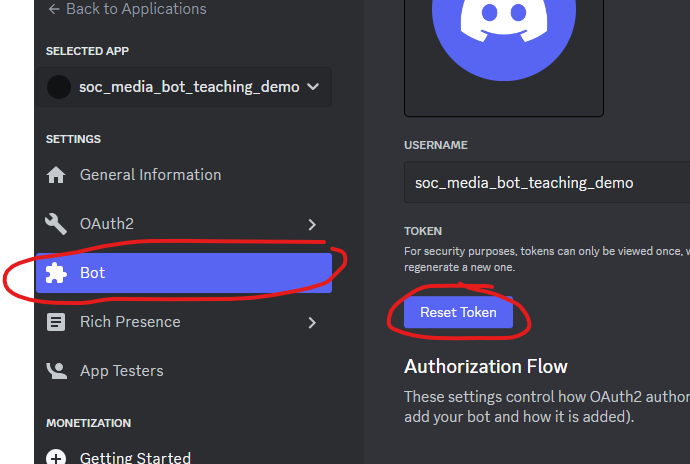
Fig. 22.4 Reset your token and save it somewhere.#
22.5. Get Bot Invite Link and Set Permissions#
Next we need to create an invite link so your bot can be added to different discord servers.
First, go to the “Bot” tab and enable “Message Content Intent” so that our bot will be able to read messages on discord in the future.
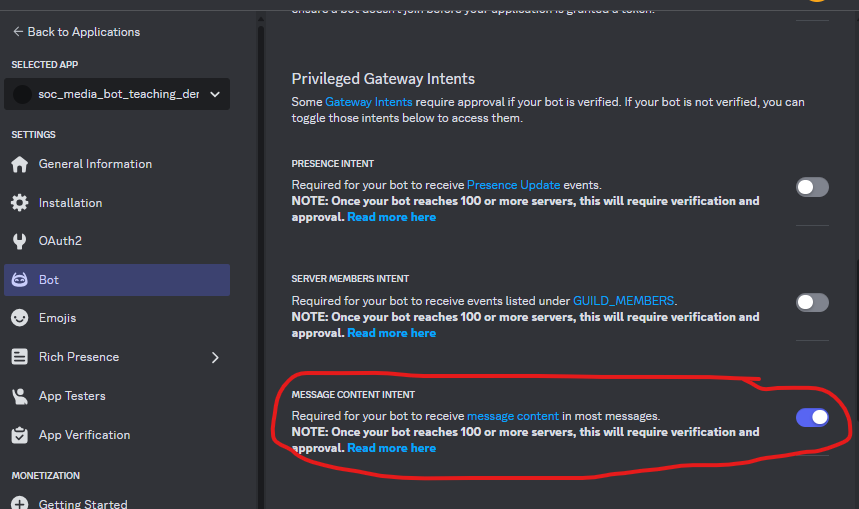
Fig. 22.5 Enable “Message Content Intent”#
Now, to get a bot invite link, go to the installation tab where you will be able to get an invite link.

Fig. 22.6 Select the install tab#
Then paste this link in a new browser tab, and when the page loads it should ask permission to add your bot to a server if you want.
For this textbook, we suggest only using “Guild Install,” then scroll down and set default scopes to:
application.commands
bot
We then suggest the following permissions:
Attach Files
Create Public Threads
Read Message History
Send Messages
Send Messages in Threads
View Channels
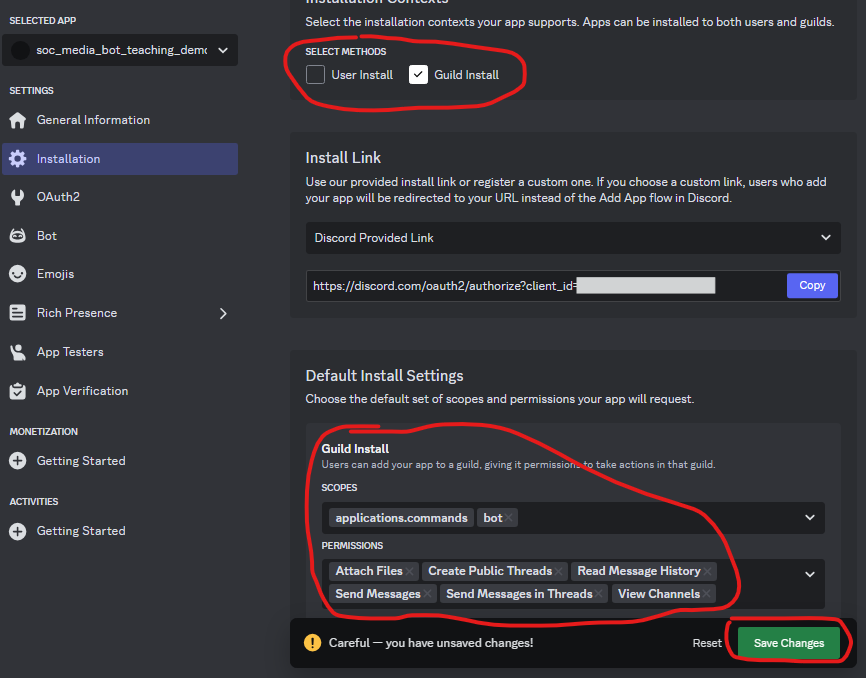
Fig. 22.7 Set default permissions#
Note: We are new to Discord bots and don’t know the permission structure wells. If you are looking at doing more with your bots, you can see more about the different permissions here, and in particular we recommend looking into adding application commands.
Make sure to save changes!
Then you can copy the Install Link
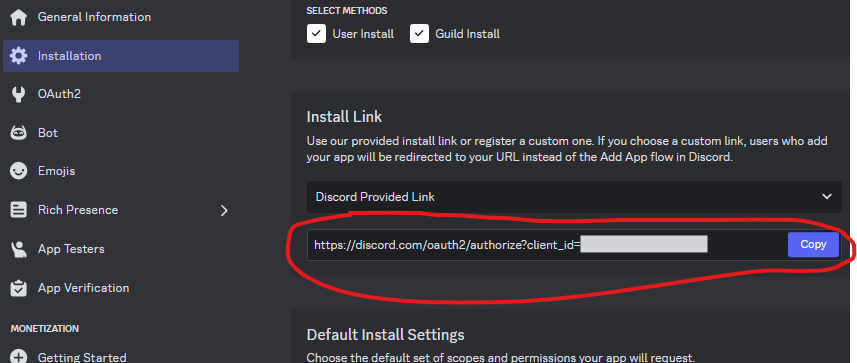
Fig. 22.8 Copy the install link#
This invite link can be given to the owner of any discord server and they can use it to invite your bot to their server.
22.6. Add app to a Discord Server#
To add your bot to your own discord server, open a new browser tab and copy the link in to the url bar. Then you will have an option to add your bot to any servers you own.
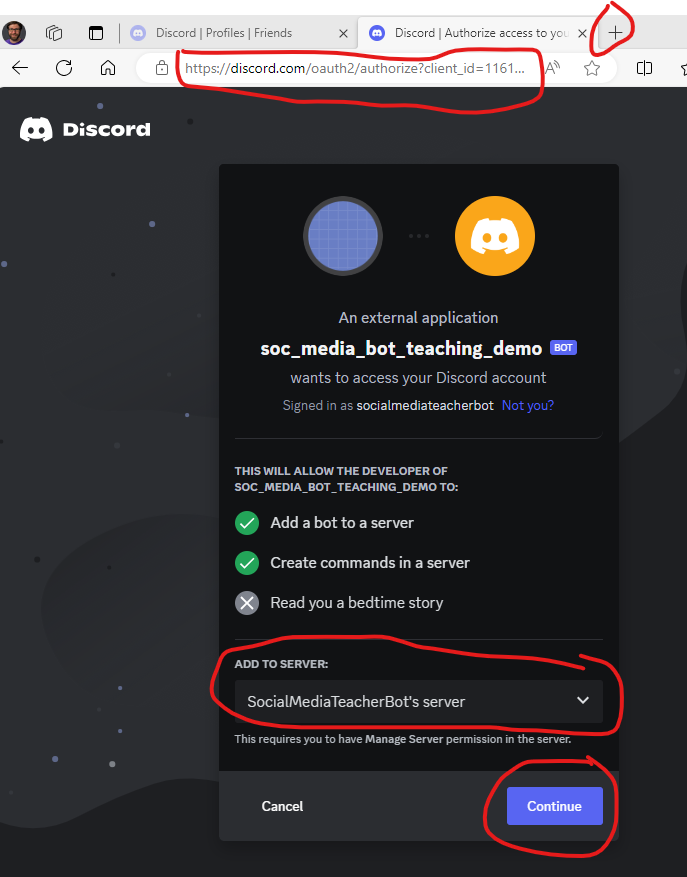
Fig. 22.9 Add your bot to one of your servers.#
Note: After adding app to server, there is a confirmation page about the permissions. “Authorize” your bot.
22.7. Get Channel Id and Server Id Numbers#
Two additional pieces of information you might need for your bot ares the channel ID for a channel in a discord server, and the server ID (or “Guild Id”) for the server itself. In order to get the channel IDs, and server IDs, open your settings menu.
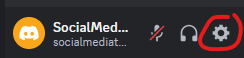
Fig. 22.10 Open your settings menu.#
Then enable developer mode in the advanced settings.
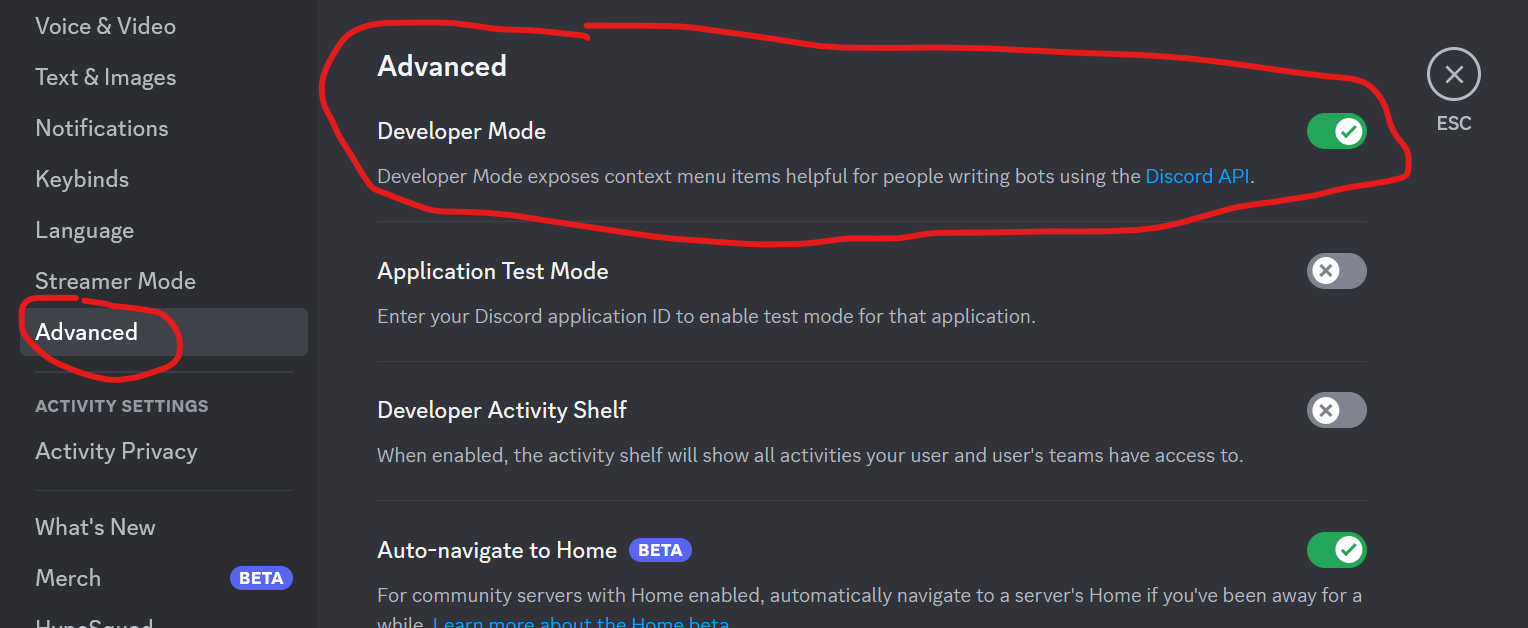
Fig. 22.11 Enable developer mode.#
Once developer mode is on, you can get a channel ID by right-clicking on a channel.
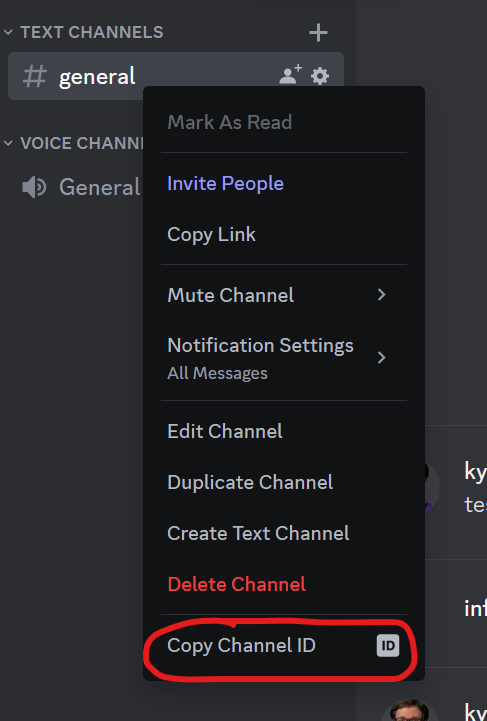
Fig. 22.12 Copy the channel ID by right clicking.#
You can also get the server ID (or “Guild ID”) by right-clicking on a channel.
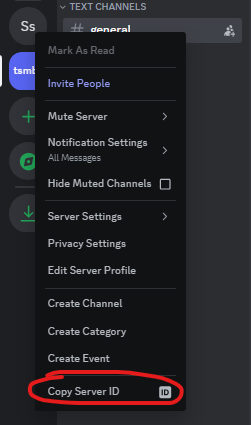
Fig. 22.13 Copy the server ID by right clicking.#
Save the channel IDs and server IDs somewhere so you can have your bot reference it later (e.g., post to that channel).
22.8. Test your tokens#
Now that you have your token, and other info, you can test out your code in chapter 2.3.8 (Demo: Try Running the Discord Bot!). You can try running the code and replacing the fake discord token and channel ids with the ones from your account, and see if you can use the code to make an actual post to your account.
22.9. Understand Discord Rules for Bots#
Before you try doing anything too creative with Discord bots, make sure you look over the Discord Developer Policy, that way you don’t get yourself banned.